I have yet to perfect my sewing skills for clothes. Sewing binding around the neck and arm holes puts an end to my projects… every… single… time! It just never goes as planned. And when I see members of the Beginner Sewing group on Facebook talk about wanting to sew clothes, I cringe. Do I warn them now? Do I stay positive and send encouragement? Or just wait for them to realize how hard sewing your own clothes really is for beginners? Typically I send my kind words of encouragement mixed with subtle warnings. However, I have a new solution with this “how to sew the easiest dress for beginners” post!
I may not have mastered this area of sewing (yet!), but there is one thing I have mastered, and that is how to recognize the easiest dress you can sew as a beginner. This tutorial from Talk2TheTrees allows for less cutting, no bias to finish the arm and neck holes, she measures in my math style, And best yet, the price is pretty fantastic.
For those of you who like new upcycle ideas, this is also a great way to make an old top new again! I say give it a try!
Not ready to sew the easiest dress for beginners yet? Save it here on Pinterest for later…
How to Sew the Easiest Dress for Beginners Tutorial from Talk2TheTrees Featured on Instructables.com
What You Need

- First you will need a ribbed tank top. I got mine from Walmart for 2.50, or you could also use a t-shirt
- 3 yards of matching fabric. Clearance section is my favorite. I got three yards for 3.00 total!
Make the Cut

Cut the tank top almost in half. This is really your preference. Depending on your bust size, and how short you want your dress. The shorter the tank top, the shorter your dress will be.
(I cut mine a little too short.. oops!)
Sewing It Up


For the bottom part of your dress take the fabric and wrap it around your waist about 1 1/2 times, and cut in a straight line. The fabric will come to you already folded, don’t unfold it. This way you have kind of a bubble hem. You don’t need to hem up the bottom at all, and the inside will look like the outside.
I never measure, I never use patterns… Sorry if this seems silly!
Next you fold your fabric in half. Remember it’s already folded, so you are folding it again, creating a skirt. Sew up the short side. (There will be four layers of fabric that you are sewing.)
Making the Ruffles


You have kind of a big blocky rectangle skirt. Next open it up and change your sewing machine’s tension so it will create the biggest stitches possible. Instead of sewing a waist band in like a normal skirt, you are just sewing a straight line around the two layers of fabric joining them together. (You are sewing the raw edges, not the bubble hem)
This is where I didn’t get pictures.. awesome.
We are going to create a ruffle. Don’t do a back stitch when you start sewing around the skirt or after.
Make sure the skirt ruffles are evenly distributed and pretty loose.
Sewing the Top to the Bottom

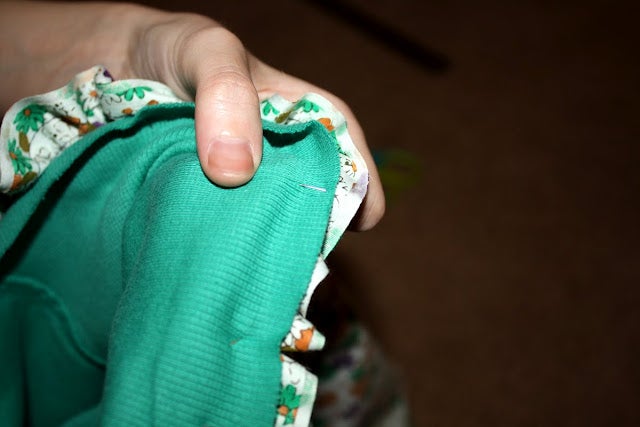

Turn the skirt part inside out so that the raw edges (from when you turned it into that big blocky skirt) are facing out, and put the tank top inside as pictured.
Next you will pin the tank top and the dress together.
Once it’s pinned make sure that the tanktop part of the dress folds out to be inside out like the skirt part.
Make sure that the tank top park lays flat and the skirt part is ruffled still.
Make sure your tension is set back to normal and sew the skirt and the tank top together just under the previous stitches.
Almost Done!

Remove the pins and the dress part is done! Now for the sash.
The Finishing Touch!


Cut a strip out of the left over fabric, about double of how thick you want your sash to bed. Fold it in half long ways so that the printed side is facing in. And sew up the sides.
Turn it right side out and finish up the edges, and you are done!
The sash is not actually sewn onto the dress, it’s removable and is just tied in the back. You could always use a regular belt or another coordinating fabric for the belt!
Finished!


This dress took about 30 minutes to make. It cost about 6.00 total.
I now have three of these dresses. They look good with a cardigan, and a pair of tights or leggings.
NOTE: I have a video here that you can watch to see how to easily create the ruffled look. Just the first few steps in the beginning with show you the technique she mentions above.
One Comment