How to Sew the EASIEST Cardigan Tutorial
I am not one for sewing with partners, so when this tutorial popped up on my Pinterest account from MeSewCrazy, I thought it would be perfect to share for those of you who may be like me. I will be adding this to my Sunday-Funday sewing line-up, but for all of you fellow beginners out there, please note that she has it rated as an advanced-beginner project. Knits are not the easiest fabric to start sewing with. If you have not practiced with knits yet, I suggest starting out a little smaller before jumping right into following this “easiest cardigan tutorial.”
Getting started with knits
Below is a post that can help you learn a little more about knits before you get started on this one. I also have a smaller project that you can practice using your knit fabric on. If you do not consider yourself an advanced-beginner, I recommend making a headband with a twist that matches your new cardigan! A great knit intro project to prep you.

If you are ready, let’s move on to the cardigan tutorial…
Skill level: Advanced Beginner (familiar sewing with knits)
Time needed: 1-2 hours
MATERIALS:
- 2 – 2.5 yds knit fabric
- Old sweater for tracing around (raglan shape works best)
- Large piece of white paper
- Marker / pen
- Universal ball point sewing needle
- Coordinating thread
- Rotary cutter / fabric scissors
- Pins
- Sewing machine (serger not required)
HOW TO SEW A SLOUCHY CARDIGAN:

To make the slouchy cardigan pattern:
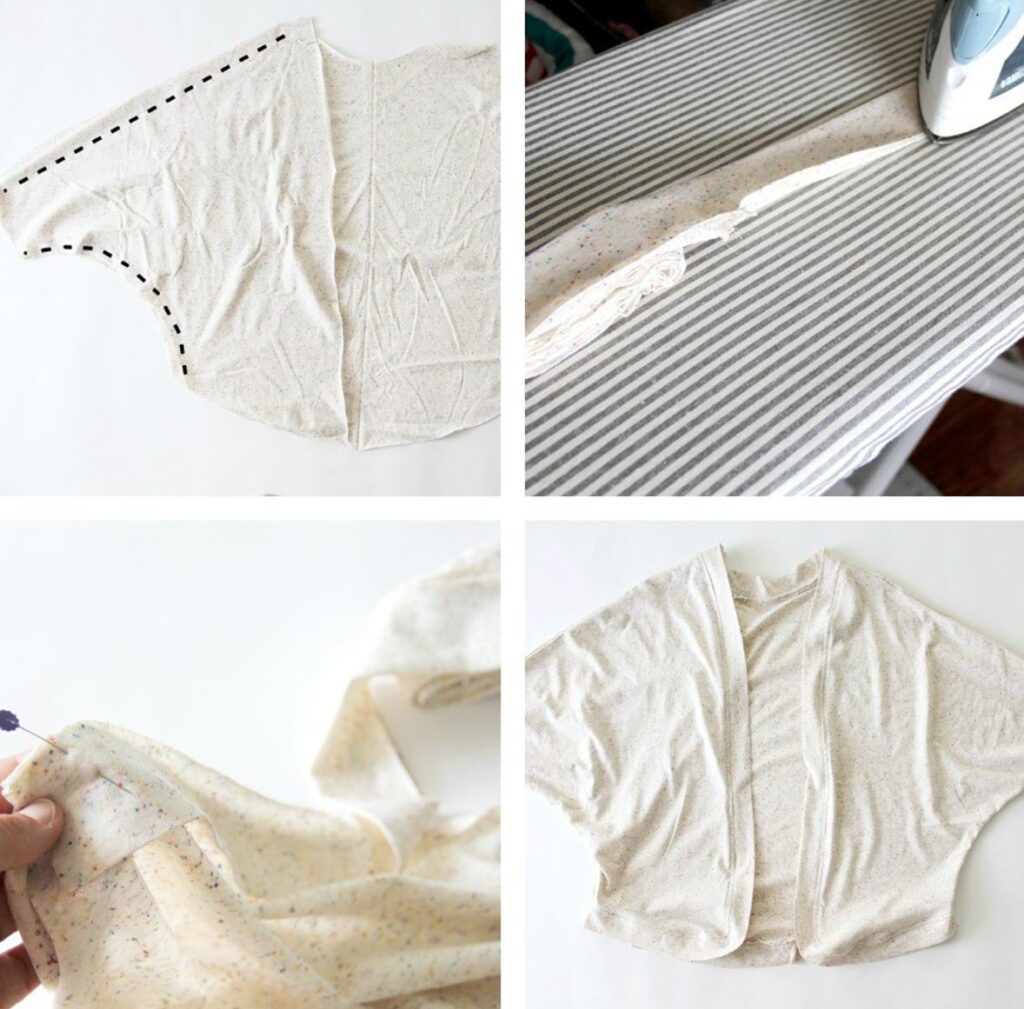
- Lay your current sweater in half (on the fold) on top of your tracing paper. Trace around the front centerfold, and your neckline as is. I lengthened the front fold of my pattern to my desired sweater length. Follow the general path of the shoulder seam down to the sleeve hemline. You want a basic, slightly curved line all the way down. (My previous sweater was a 3/4 sleeve length, so I extended the pattern sleeve to make a long sleeve cardi pattern.) From the bottom front centerfold of your new pattern piece, create the curve of the bottom hem towards the side seam of the sweater. Lastly, draw an arc from the bottom hem side seam, to the sleeve bottom – almost like you are making a curved triangle for the sleeve. This will be your BACK PATTERN PIECE, you will cut (1) on the fold.
- To create your FRONT PATTERN PIECE, draw a slightly curved straight line from the edge of the back neckline to the bottom hem of the sweater. (You are essentially cutting off the back fold portion from the back pattern piece.) Cut (2) mirror images of the new front pattern piece.
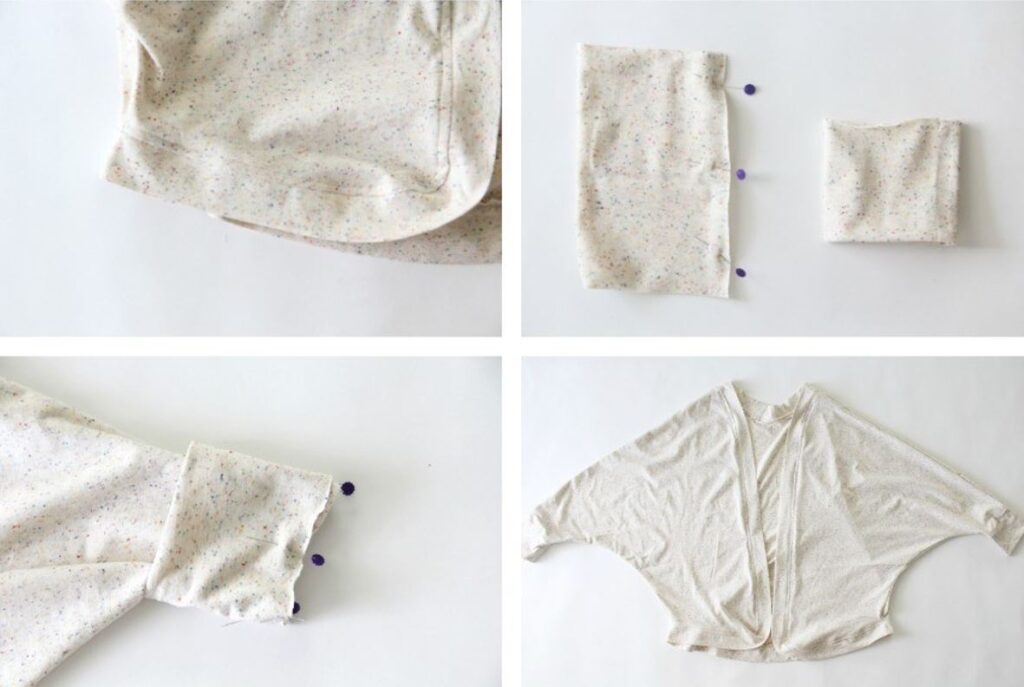
- To create the SLEEVE CUFF PIECE, measure the length of the sleeve hem. Subtract 1/2″ from the measurement, and make a rectangle this length x double your desired sleeve cuff width.
- Lastly, you will need anywhere from 3.5 – 4.5 yards of a 4″ length strip of knit fabric. I simply cut a few 4″ strips of knit fabric selvage to selvage, and sewed them together at the side seam.


How to sew the slouchy cardigan:
- Place your front and back slouchy cardigan pattern pieces right sides together, matching up the side and shoulder seams. Pin and sew the shoulder / upper sleeve, as well as the side seam. Repeat for both front pattern pieces. Press seam open.
- Fold the long 4″ strip of fabric in half, wrong sides together, matching up the long outer edge. Press.
- Pin the raw edge of the folded strip to the outer edge of the cardigan all around.
- Sew, using a 1/2″ seam allowance, leaving the first 1″ of fabric unsewn on the strip. When the strip meets up at the other end, after you have made it all around, stop and sew the strip ends together where they meet. Trim seam allowance, and press seam open. Finish sewing strip to the outer edge of the cardigan.
- Press seam towards the inside of the sweater and edge stitch all around to secure seam in place.
- Fold sleeve cuff in half, right sides together, matching up the side seam edge. Pin and sew. Fold the sleeve in half, wrong sides together, matching up the raw outer edges and enclosing the seam. Press.
- Slip sleeve cuff over the cardi sleeve, matching up the raw edges and the side seam of the cardi with the seam of the cuff. Pin around and sew, using a zigzag stitch, stretch stitch or serger (if you have one).
- Fold cuff down and press seam up. Repeat for both sleeve cuffs.
And you are finished!

Check out more from Jessica’s blog here.
This is a great website Joan! Love the outlay and the overall aesthetics. Great Job!