Bringing wine as a hostess gift is never a bad idea! These carriers are also a nice solution for a reusable shipping bag for your wine. When I saw this tutorial on how to sew a wine carrier that was posted in Designed by Chance, I couldn’t resist sharing it. Weather you call it a bag, carrier, tote… it serves a respectable purpose.
When I was deciding the skill level to make this wine carrier, I was putting it together as puzzle pieces in my head – sometimes I like to think of tutorials and patterns in that way. Breaking them down piece by piece so they are not so overwhelming This one will have several pieces and parts, but I think after you solve the puzzle, make a second one would be a breeze. It is all about trying it out and seeing how you would simplify it to best work for you. I am going to rate this tutorial as “confident beginner.”
My recommendations
When you are looking at fabrics to use for this carrier, I would like to steer you in the direction of a duck canvas fabric. These are a nice sturdy fabric that can support the weight this carrier will be holding. You can still use a all-purpose thread color of your choice and your universal sewing machine needle should do the trick. If you find you are having issues with this using a thicker fabric, switch it to the denim needle. But I will say, I have sewn with layers of duck canvas plenty of times using a universal needle with success.
My tutorial simplifications
Looking over this tutorial one part I would simplify for beginners would be the handles. When you get to the part with the handles I would use a webbing. You can purchase webbing by the yard at your fabric or craft store or order it online. Or, you could also use a premade handle – be creative with something that could support the weight of up to the four wine bottle this bag could hold. After all, these little things are what makes your project unique!
My second alternative suggestion would be for the fabric piece used to cover the “exposed edge” This is one of the last finishing steps in the tutorial below, but I think there are a few open doors for creativity here. Perhaps a good time to add in other embellishments. Play around with it and see what you like.
Here is a video to show you how I simplified it…
Not ready to make this wine carrier yet? Save it here on Pinterest for later…
DIY Wine Tote: AKA Booze Bag
Materials:

Fabric, not much more than a yard or two, you can also use two different kinds of fabric like we did (I used a large defective Ikea pillowcase and got two bags with a separate piece of fabric for the interior and handles) you can use your scraps for this, which is great, because you don’t need a lot of large pieces.
General Sewing Supplies (you know … thread, needles, pins, scissors)
Patience (bring lots of that)
Getting Started

Cut two side pieces (like image above) 14″ x 9 1/2″ (this includes a 2″ seam allowance at top and 1/2″ at bottom). The side pieces are curved on the bottom.
Next, cut one long rectangle to attach them, 7″ x 32″ (includes a 1/2″ seam allowance on sides and a 1″ seam allowance on the short ends). It has to be the full length around three sides of the smaller, rounded side pieces. You will end up with a bag with two pieces on the side and a long band in between.
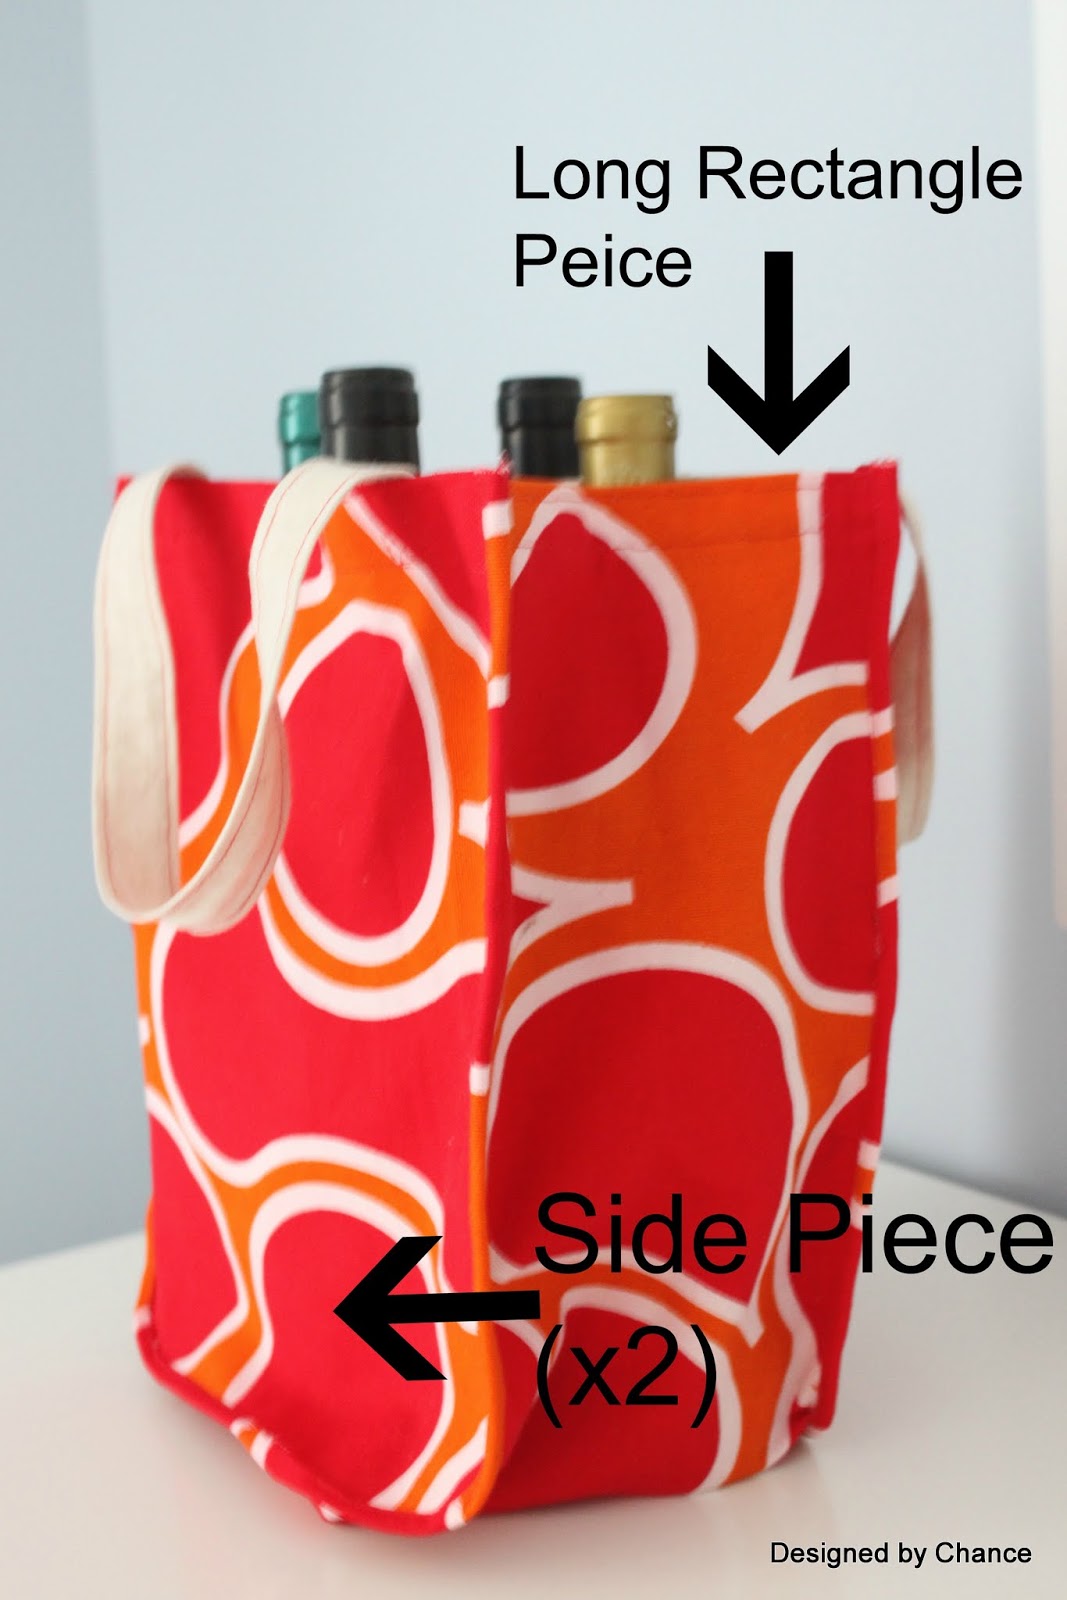
See how the side pieces are flat and they are attached by one long piece? The rectangle piece goes from the top down, along the bottom, and back up. I’m not sure how else to explain it. Hope that makes sense.
Sewing your bag
Sew the top of all three pieces over twice. That means for the long rectangular piece you will sew both short ends. Top stitch along the folded edge and the other side of the folded fabric to add strength.

Making the handles
Make the handles by cutting a two inch wide by 16″ length strip of fabric. Sew together with front of fabric facing inward along the length of the fabric and turn right side out. Then top stitch both edges just like above.
Pin handles to the inside of each side of the two curved pieces.
Stitch handles with “X” pattern.

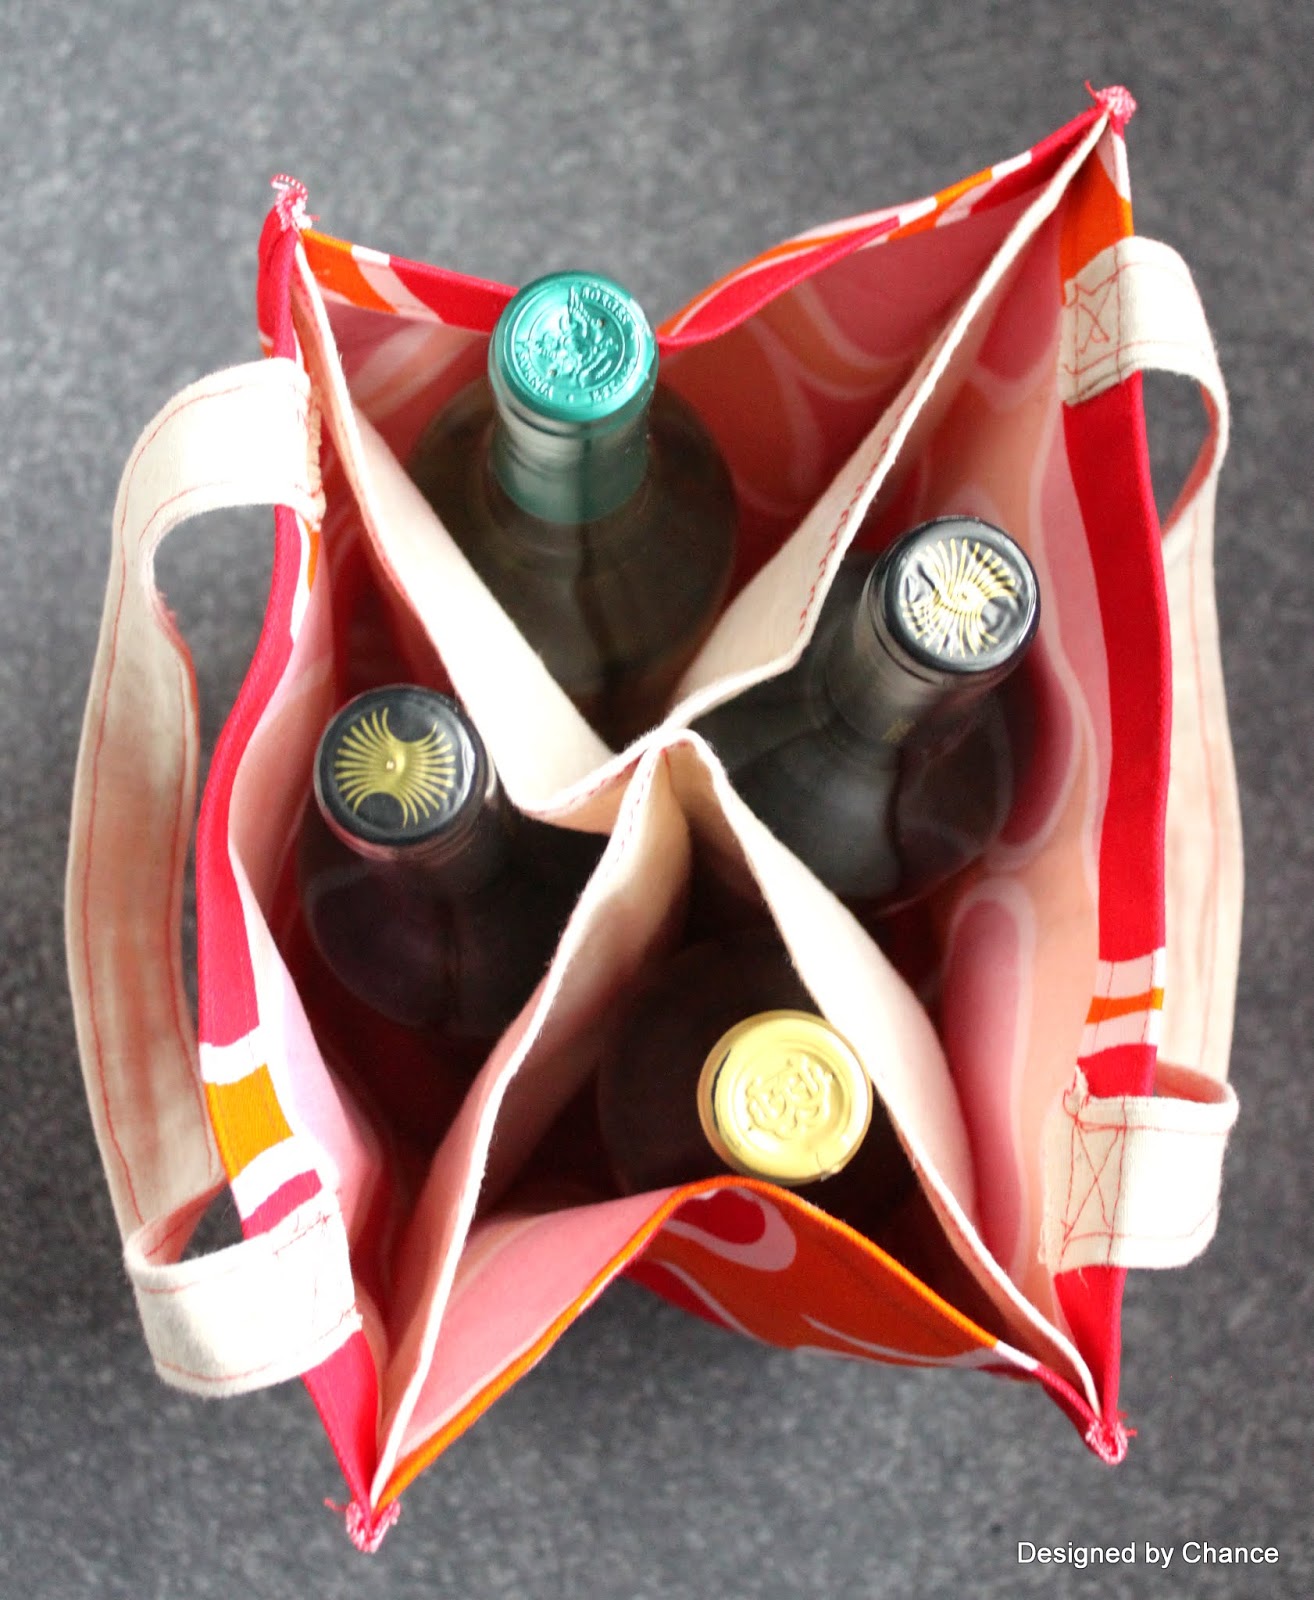
Making the dividers

To make the dividers in the bag, cut two rectangles of fabric about the size of your smaller (rounded) pieces 11″ x 10″. Finish the top and bottom of these pieces. We added a decorative stitch at the top for fun. Then pin the two pieces together and stitch right down the middle. The dividers do not attach to the bag at the bottom, so they can be shorter than the bag itself.
Now comes the hard part…

Pin the long rectangle piece to the two smaller side pieces with one edge of the divider fabric in between on both sides. Make sure you have the correct flap of the divider fabric attached to each side of the curved outer bag fabric.
In the end you want an nice “X” dividing the bag into fours with the complete divider fabric parallel to the wider side of the bag. You will be sewing three pieces of fabric together at this point. Be sure to gather some of the long rectangular fabric as you go around the curved edges. You will be pinning the long rectangle along three sides of the smaller piece, and the divider fabric alone the two edges.
We pinned one side, then sewed it. Pin and sew the front of the fabric facing outward. You will later cover the seam with fabric so it is ok that you will have the seam on the outside of the bag. Then we pinned the next side and sewed that side too. At this point the shape of the bag will be complete.
Moving right along…
Cut a strip of fabric 34″ long and 1 1/2″ wide to cover the exposed edges on the outside of the bag. Fold both long edges inward to create about a 1/4″ or 1/2″ “cover” to go around the exposed edge.
Sew your edging over the exposed seam with a top stitch. We cut off any extra fabric outside the seam of the bag to make as much room as possible for the “cover.” We only had a 1/4″ edging so it was very tight. Sew this top stitch as close to the inner edge of the seam cover as you can. We literally had about 1/16″ space between the stitch and the edge of the seam cover. In the name of ease we left the top of the “cover” edging raw. You could also fold it inward and stitch it closed. (I know there is a name for the cover of the bag edge that I am describing over and over again, but I just can’t think of it or find in on google. That is the problem with google, if you don’t know the name it is very hard to find it.)

Cut any stray strings of thread and admire your handiwork.