How to Make a Quilted Pencil Bag
As always, we love the tutorials from Tamara over at Tamara’s Joy. If you are looking for a summer sewing project that can introduce you to quilting techniques, this is the perfect summer challenge. This project can also be a great way to use up some of your scraps. And what newbie doesn’t like a well-done video to help walk them through learning?
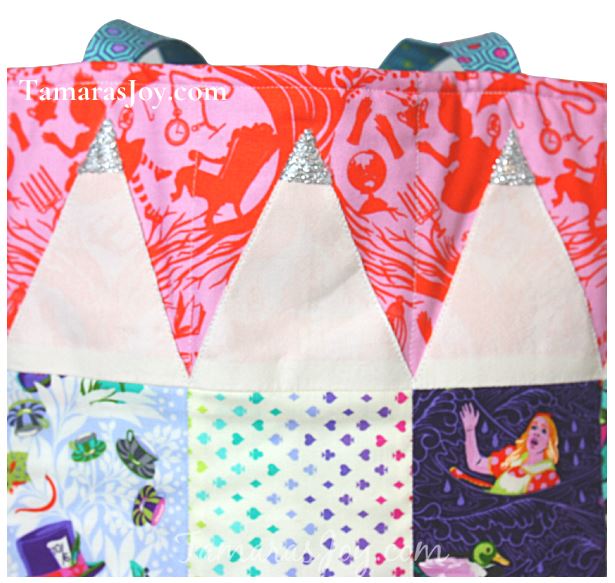
Oh, and don’t be fooled by the project name “pencil bag,” this bag is large enough to put books and folders in, as well as many other things. The name of this project comes from the cute pencil design on the front of the bag, not because it is the size to put only pencils in it.
And last but not least, what a simple conversation this bag would be as a “colored pencil” bag. Grab any color embroidery floss that you like and make it your own!
QUILTED PENCIL TOTE BAG / FUN TEACHER GIFT
Tutorial and video by Tamara’s Joy
Giving a gift to a teacher can become complicated, sure you could hand over a gift card and call it a day. And I would be lying if I said I never did that. But sometimes it is fun to gift something that can not be purchased.
The answer? The Quilted Pencil Tote Bag! It is a fun sewing project that can be made on a relaxing Saturday afternoon and I promise you it will be appreciated.
HOW TO SEW THE QUILTED PENCIL TOTE BAG:
The entire step-by-step tutorial to sew this quilted pencil bag together can be found on YouTube below. Scroll further down to find all the pertinent items needed, measurements, and seam allowance instructions.
WHAT YOU NEED:
- Fabric (this is a fat quarter friendly project)
- Thin batting
- Double-sided fusible (optional)
- embroidery thread, a single color of silver, or make each pencil its own color!
- thread and sewing tools
.

MEASUREMENTS:
- Lining: 17.5″ by 19″ (cut 2)
- Batting: roughly cut a bit larger then 17.5 by 19″ (cut 2)
- Outer Fabric Backing: 17.5″ by 19″ (cut 1)
- Front Outer Fabric, Pencils: 14″ by 4″ (cut 5, each a different fabric)
- Front Outer Fabric, Upper section: 6″ by 17.5″ (cut 2, each a different fabric. One white (the pencil tips, one for the backdrop of the pencil tips)
- Handles: 22″ by 3.5″ (cut 2)

SEAM ALLOWANCE:
When sewing the seams for this quilted pencil bag use a 1/2 inch seam allowance everywhere except for three seams.
- When sewing the 5 strips of pencils together, use a 1/4″ seam allowance.
- When sewing the straps use a 1/4″ or 1/8″ Seam allowance.
- When sewing the final top stitch around the entire top of the bag use a 1/4″ seam allowance.

For all the details to sew this quilted pencil bag together please follow along using the quilted pencil tote bag YouTube tutorial.